Monday, February 29, 2016

adventures in terrain building part 5 and this and that

Yesterday was my brother's birthday, I think I made it special for him, took him to the mall, took him to Mitsuwa, which is a Japanese grocery store/food court, cooked up Corned Beef and Cabbage, which is something I had never done before, it turned out quite well for a first try.  But when I took the kids outside, I was under dressed, should have put on a coat, it was only fifty something degrees out, and not eighty something, and so have come down with an awful cold, first time in years.  My throat is sore, my head is swimming, not happy about that.

No good deed goes unpunished, as the saying goes.

Nevertheless, I did get some work in on the tree stands.

Foam board is not the easiest thing to cut.  The paper the foam is sandwiched in between, doesn't quite cut the same way the foam does, and sometimes, even with a nice, sharp knife, the foam snags.  So I wound up re cutting the stands, and re cutting them.  Then afterwards, I had found The Unofficial Guide To DBA, which is a very good thing to have, to decipher these rules, I discovered that the dimensions of my tree stands were not correct, according to the rules.

That set me aback... for a couple of days.

Finally, I decided I couldn't afford to care.  I'll be playing my miniature battles by myself anyway, and I don't care.  So I decided the stands won't be scrapped and new ones re cut to fit a rectangle the length of and width of does not exceed nine base widths or some such anyway.

Finally, I set about gluing the home made trees, made the hard way, to their stands.  Four stands.  I used a pointed stick to punch holes into the foam core, pushed the trunks into the holes, then put in the super glue around the bases of the trunks where they join the foam board to keep them in place.  Here are how they look.


All in all they don't look too bad.  Need to flock them.  Not sure if I'm going to add undergrowth or fallen trunks though.  I want to be able to place individual figures in between the trees like light infantry, scouts/bidowers in there like in Lion Rampant, or bunches of Warband in like in DBA.  Or a whole whack of Polish knights emerging from the tree line like in the epic film Krzyzacy to take on the Teutonic Order at Grunwald.

So, to update, I will need to flock these, then build a road, a river, two gentle hills, two rough hills, and three plowed fields, and maybe a hamlet... a strategic hamlet with concertina wire, some huts, maybe emplacements for a battery of 105 howitzers and a helicopter pad.  Just kidding.


Monday, February 22, 2016

adventures in terrain making, part 4

I've been hard at work on these trees, in between work and keeping my furry, four footed children entertained, fed and happy.

Since the last post, I've painted coat after coat after coat of green paint over the foam foliages, trying to eradicate the shiny spots left by the bare plastic.  I think I've pretty much gotten rid of those, except for perhaps one or two here and there, but I soon tired of playing whack-a-mole with them and called that part good.  The color was okay, a nice deep green, by themselves in that color, they would have looked good enough, but I wanted something more, some highlighting.  So I went to work, dampbrushing a shade of light green all over each of the foliages... I had also made two more of those, bringing the total to sixteen, more than enough I think. 

They were actually starting to look pretty good.

The next step was to model the trunks.  These were plain wooden dowels, smooth, round, not at all like actual tree trunks.  To fix that I used some indoor wood putty, I could have used the green or white hobby putty too.  I had gotten a lot of green paint on the trunks which I had to scrape off, in addition to roughing up the smooth wood so that the wood filler would stick better.  Then I shot the putty in lines up and down the trunks, not too much of it, just enough to work around then rough up, rubbing it, picking at it, scraping gently with a serrated knife, working bits of putty that had fallen off back in until I was satisfied that they looked kind of sort of like miniature tree trunks.


I waited for the wood filler to dry, I didn't have long to wait as it was quick drying filler, so it was soon time to paint the trunks.  

When people paint trees, they paint the trunks brown, and companies that make models of trees mold the trunks in brown plastic, but when you look at trees, they're not really all that brown, there's a lot of grey in the brown, just a little brown, and a lot of grey, and some green where moss collects.  So first I painted the trunks in raw umber, a dark brown without the color being like chocolate.  Yes, brown, but I only started with brown.  


Next I added some medium/light grey to the brown, a little black, a little more brown, a little more medium/light grey until I found what I thought would look good, and started painting over the brown, dampbrushing it, I didn't want to paint the trunks entirely in that color, I still wanted to keep a lot of the brown, but wanted to get a rough texture, the look of bark, and so my grey/brown mix would do just that, give the trunk the look of rough bark.


The last big hurdle had been cleared, I painted and highlighted all sixteen trunks, which are all drying now.  Next, I'll do some touching up where the putty and paint went into the boughs, and in the meantime, I'll need to figure out a way to really secure the trees to their stands, as well as to find or make things to further decorate the tree bases, undergrowth, fallen, dead trunks.  Not to mention looking up my copy of the DBA rules to find out what the legal size of a forest stand should be.  Lion Rampant doesn't have anything on that, but DBA is rather strict about such things.

So until next time... En Avant!!


Wednesday, February 17, 2016

adventures in terrain making, part 3, from the ashes...

Just when I wanted to give up, I saw a post on facebook that inspired me to continue working on the forestry project.  On the page International Toy Soldier Collectors, a member had posted some pics of his World War Two toy soldier setup, 54mm Germans with a Tiger.  It was the trees and greenery that had caught my attention, the big, solid growths, painted green and shaded in black really caught my attention.  They did not look at all like the Model Railroading trees, not at all!  Yet, for the set up he had posted pictures of they were perfect!

I passed the rally roll and reformed!

So off I went, equipped with green acrylic paint I had bought from the craft store, some inexpensive brushes, and I went right to work, slathering paint all over the plastic I had formed into foliages... and for once, I was really starting to like what I saw! 
here are the trees sprayed on hunter green enamel


here are some of them dampbrushed green over the spray paint


more of them heavily brushed over with an acrylic hunter green


and one covered in green, then damp brushed in a lighter green!  I like!!


another shot of the hunter green brushed on, with the flash on


finally all of them together, they're coming together!


So I'm thinking of painting on another heavy coat of acrylic paint for them all to get rid of the shiny metallic looking spots that really spoil the appearance of the greenery.  I'm not sure whether to go for the dark green as an overall coat, then a damp brush of green green over it then a heavy drybrush of light green to bring out the appearance of individual leaves... or skip the dark green and just paint green green then the light green.

What do you think?

Another benefit to all the heavy paint all over these is that the paint makes the greenery solid, they don't crumple easily in my hands, leaving bits everywhere, they're solid!

So now I'm thinking about another foliage to replace the one that had been eaten out by the spray enamel, the petrochemicals don't play well with plastic foam as I learned the hard way. Besides more trees, bushes, shrubberies, hedges too!  The scraps I had ground up could be recycled as greenery on the banks of a river, a road, around ponds and in marshes, the possibilities are almost endless!

It's turning out well after all, and I'd learned not to be so quick to give up and give in.

Onwards!

For those of you living in the US, I used the "Americana" line that one can find in craft stores, really inexpensive stuff that goes from .50 to $1.00 a 2 oz/50ml bottle.

Monday, February 15, 2016

adventures in terrain building, part 2

Well, I've learned a few things lately...

Indoor/outdoor oil based spray paint does not play well with florists foam.  I sprayed some on a chunk of foam I had shaped into another stack of foliage, and it began to bubble and pop, like of like bacon frying in the pan.  Not a good sound to hear coming from a chunk of foam plastic.  Then the surface started to develop a liquidy look to it, as though too much paint had been used, which was true, but that wasn't paint pooling up in the crevices!  Then bits of foam began caving in.  I tried shoring it up with bits of foam I had whittled and ground off... to no avail.


chemically fried foam


and the middle part all caved in, bits of scrap stuffed in the hole didn't help


I wanted to just give up, but I had gone too far to give up at this point, for good or bad, I had to keep trying.  I decided that maybe a lighter spray, with the can further away might work.  It did, at least the plastic foam didn't dissolve on me, but what I got was less than adequate coverage, with a lot of shiny spots left.


And a hideous mess in the bathroom, it's too cold outside to paint, even though it's in the 20's fahrenheit.  No, I'm too ashamed to post what I've turned the bathroom sink into.

So what to do next?

I had decided to try painting the last three trees with acrylic paint, a craft paint in "Holly Green", a little darker than green green, or "Festive Green", dabbing it on with a brush.  Three foliages took a long time to paint, because florists foam has an awful lot of surface area.  A Black Hole has a lot of mass, very little surface. Florists foam has some mass, not really a lot, but an awful lot of surface area, as I had discovered during this evening's adventures.  And still there were shiny spots where the paint didn't work it's way in.


It really isn't funny but it's really green and runny...

As I said, I've gone too far, spent too much on materials to simply pack it in now, but I'm really starting to think I may have been better off just buying a Woodland Scenics set of tree trunks, and some of their foliage foam, and go that route.

Lesson learned, but for good or bad, I must see this project through to the end.

I do hope that the road and river sections will turn out better, I really, really do...


Sunday, February 14, 2016

adventures in terrain building, part 1

Even though the Gauls aren't yet finished, I've been wanting to build some terrain, been wanting to do that for a very long time.  I had watched a lot of youtube videos on terrain building, especially how to make trees, which are probably the most important terrain feature, after the ground itself, of course.

One page really stuck out, and stuck out even more than the videos I had seen, and I had seen many of them.  It was on the Beasts Of War website.  There, a modeller built a lot of trees, using dowels, covered with wood filler to simulate bark and the features of tree trunks, and furnace/air conditioner filter material.

Brilliant!! I thought, so off I went to the local store belonging to a chain that sports a lot of orange, you can guess which.  They didn't have any such material!  All the filters were folded paper packed inside cardboard frames! Went to a big box superstore. No luck there either! I was starting to get frustrated, and at the same time, impatient.  I felt I absolutely had to come back with some materials with which to build my project. I went to a local fabric/craft store. A forlorn hope.

They had dowels, well, these can be found at any craft store, even in the craft departments of bigbox stores. But what to use for foliage?  They had a lot of moss, lichen.

I don't like using lichen, or moss, they're not permanent, not like synthetic materials, which will stay and stay for thousands of years, though not necessary in usable condition perhaps.  Lichen is something I had used for terrain long, long ago, when I had built terrain and two complete NATO and Soviet armies, a brigade of NATO troops and a Soviet Motor Rifle regiment, having crafted all the tanks, MICV's even AAA and SAM tracks.  I still have the little balsa vehicles, but all that's another story...

So I used lichen for bushes, trees... bushes and such were small clumps, trees were represented by taller mounds of lichen. Then to preserve them, I gave the lichen a generous spraying with hair spray.  A couple of years later, gathering all that to pack to leave Chicago and move to the one time exoburbs, now suburbs, I found these stands, and on picking them up, they disintegrated in my hands, leaving cardboard and dried carpenters' glue behind.  It was almost like that scene in The Time Machine, where Rod Taylor was introduced to a collection of antique books from tens of thousands of years before, then tried to pick one up and it simply turned to dust in his hands!  Yeah, just like that!

So no, I don't use lichen.

And because I'm such a cheapskate, I didn't want to buy ready made trees.

Next aisle over, I saw foam, styrofoam, and florists foam.  I didn't want to use styrofoam, because all those tiny plastic balls I knew would take years to exorcize from the house and they get onto everything!  What about the florist foam?

Well, I was desperate, I had to being SOMETHING back home!  So I bought two sheets of that, nice thick sheets, dowels, a can of green green spray paint, and other things, went to another store and picked up two tubes of white wood filler, the same kind I used to base my figures with.  Went home, took a few moments, and despaired.  This is NOT going to work.  Slept over it too.

The next morning, it came to me, why not cut off chunks of it, chop it into a rough tree form, gouge it out to simulate clumps of foliage and see how it looks.  So I did.

this was made from two pieces of foam, I was thinking that the method demonstrated on the other page might just work, it did not, trying to cut a chunk of florist foam into a star shape does not work very well

so I tried to make it look round, nice, but not quite what I had in mind, unless I wanted to model an Orange orchard...


I was about to give up, again.  Then it hit me, why not go for a vertically oriented shape to the trees?

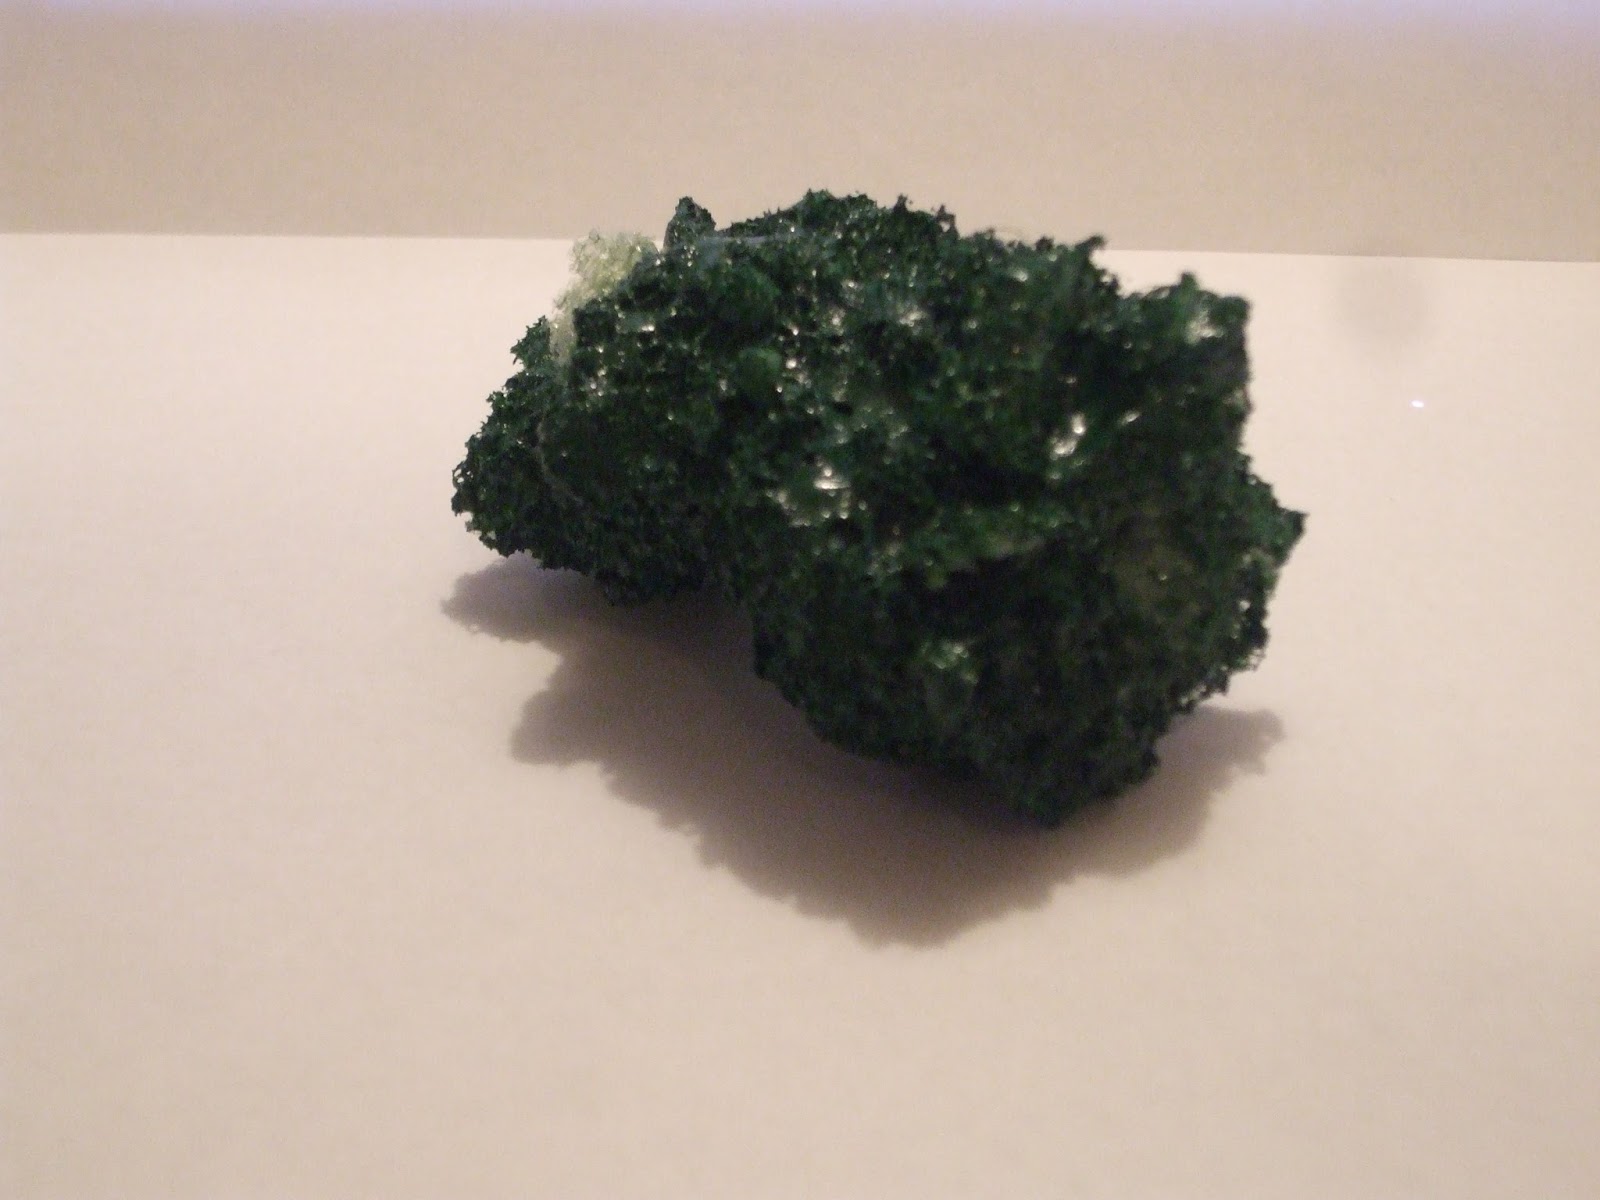
Okay, so armed with a cheap knock off "survival knife" that can't keep an edge, which was all I had, I started cutting more chunks from the board, then gently hacking, scraping at each piece, ruthlessly gouging each piece until I got something like this...

the chunk on the right is a piece before shaping it into a more of less passable simulation of tree foliage


Not too shabby... not too shabby at all.  I started cutting, chipping, hacking, gouging, making a frightful mess with all these bits and chunks, and dust, but I was happy with the overall result.

Fifteen clumps of green foam later, I needed more dowels, those I had bought were too thick.  I cut them down, sharpened an end of each and jammed them in.


Not too bad at all, not as pretty as the store bought trees, but good enough for the wargame table!

I cut out some stands from paper covered foam board, two each big enough for five trees each, one for three trees, one for two...


I'm ready for the next phase of the operation.

The plan is to super glue the trees to these, work on the trunks with wood filler, spray the foliage in green green, then hand paint the trunks. After that, some dry brushing a lighter green for highlighting.  Then to seal them all with poly finish.

So far so good...

Saturday, February 6, 2016

more about the WOTR troops...

So what I had picked up were mostly Red Box figures, which are pretty much the only WOTR figures to get in 1/72, which is my preferred scale.  I had ordered all of these from Mega Hobby in NJ in the US, for the grand sum of $111.00 roughly.

For that price I had bought four packs of Town And County Levy, a pack each of Mounted Men At Arms, Scurrers... light cavalry... Men At Arms and Retinue... and rounded out the set with a pack of Caesar 15th century European Knights.  Here are the boxes, for a closer look at the figures themselves and the counts of how many per pose, please go over to plastic soldier review for a look.
these will make up the bulk of my troops, some billmen, and a lot of longbowmer                                                    


here's a reverse of the box showing what sorts of troops are inside                                                                                        

these are most of the rest, Men At Arms and Retinue for some men at arms on foot and foot command, then the Scurrers, which I take to mean light cavalry, and the Mounted Men At Arms, for the commanders and their bodyguard teams, six cavalry for each side, heavy and light
this is the reverse of the three boxes above to give you an idea of what's inside                                                                   


and these guys are for a unit of twelve dismounted Men At Arms, one for each side     


Originally I had wanted to raise Hundred Years' War armies, English and French.  While it is easy to get good quality foot soldiers, archers and crossbowmen, it is not as easy to get mounted Knights without getting a lot more footmen!  So I thought about maybe raising armies for the Battle Of Grunwald, same problem, and the Mars figures aren't as good.  So then I thought about raising Russian and Teutonic Order armies.  But then whan I had watched Jack Diomede's videos on youtube, I stubbornly insisted on going with The Wars Of The Roses instead of the HYW or Northern Crusades.

So here they are awaiting a good scrubbing and paint.


Friday, February 5, 2016

Something different, other things I paint... I have a wide range of interests, never really sticking to one for very long. Once upon a time, I had read the late Tom Clancy's Red Storm Rising, and it had gotten me interested in modern naval wargaming.  At one time I had started writing my own novel, but that is another story.  GHQ 1/2400 models are beautiful, each a work of art in it's own right, but expensive.  So, armed with mt copy of Janes US Warships, and a book of Warships of the Soviet Navy, a stack of scrap balsa, pencils, paper, ruler, calculator, and my trusty x-acto knife I went to work.  The project never got completed, I didn't build American cruisers, the ex WW2 battleships and super carriers, or get down to building Soviet destroyers and frigates.  All in 1/3000 scale.


experimentation... trying to post pictures on my blog.

Hoping this will work without looking too badly...
here's the front view of the chariot riders, the fellow on the right is a leader, the general, and one of three, for three different options in the Gallic DBA army, I've already got a three figure stand for a general, one of a four figure stand with a general too.  I'll post those later as I figure out how to make this blog work.

and here's the back view, the figure in the middle is the leader, he has the best plaid and a special cape to show he is The Boss